Introduction

It’s day 2 or Level 2 at the California Superbike School India 2017. As was the case with level 1 (you can read about it in great detail HERE), we have another five drills to learn. But before we get there, here’s a quick recap of level 1 for the lazy lot amongst us.
Day 1 was all about the bike - using throttle control to stabilise it in corners, identifying turn points to be able to point the bike in the direction of intended travel quickly and safely. It was also about using the quick turn technique to correct lines in case one overlooks a corner entry and letting the bike’s front end do its thing, again for added stability. We also did two-step turning, which was an introduction to Level 2 and was more about sight lines.
Reference Points

Today is all about sight lines as well. Allow me to get a little geeky here since I quite enjoyed it when the coaches poured it all on us. Our eyes are designed to work great at walking or jogging speeds. But, put us on a motorcycle and let us loose and we can’t cope. Life literally turns into a blur. What’s more, the human eye is designed to chase three things – food, mate and danger. And if you pray hard enough, the latter two might actually be different.
Therefore, we love to target fixate on all three. On a motorcycle, danger equals target fixation equals panic equals choppy throttle response equals loss of speed. So, in order to be fast, smooth and confident on a bike, smooth flow of information of the road, the turns and what’s up ahead is paramount.
This is where Reference Points or RP come in. These give us two crucial pieces of information – where we are and what we need to do. The more RPs we accumulate on a track, the smoother and faster we get. We can have RPs for braking, turning, apexes and exits.
My learning?
Choosing too many RPs did confuse me. I decided it’s best to have four for regular corners – brake, turn, apex and exit – and maybe an additional one on the cornering line for long corners with late apexes.
Change Lines

As odd as it sounded the first time the coaches mentioned it, trying out new lines did wonders for my confidence on the track. Now even though there’s no ideal line around a racetrack, there are good ones. And we chase those good lines both for quick lap times and to feel safe and confident.
But, it’s equally crucial to ride around the section of the track that’s never used; the kerbs or the outside part of the corner lined with debris for instance. This helps in two situations. One, when overtaking in a race and the rider in front refuses to let you pass on the racing line. And two, the one I find myself in quite often, is when you come into a corner too hot and have no alternative but to take the dirty line; that is if you intend staying on the track and the right way up. Otherwise, you can always panic and go chase butterflies in the vegetation.
Interestingly, MotoGP gods do this all the time – taking the dirty line that is – albeit during practice sessions.
My learning?
The so-called ‘dirty’ part of the track, or the kerbs for that matter, offer a lot more traction than I imagined. I might still not want to go there in the wet, but in dry conditions, I could use them all without drama.
The Three Step

The two-step drill (read about it HERE) we did in level 1 was all about corner entry and hitting the apex. But then what? When should one start rolling on the throttle and where should one end up at the end of a turn? The three-step drill answers exactly this. And as we said at the start of this article, it’s all about where you look.
I am sure many of you have realised that we tend to rider quicker with a faster rider in front. It’s not because the guy in front has ‘super-gravity’ that sucks you towards him. It’s because as we target fixate on the rider, we are in fact looking a lot farther than we usually do. As a result, we are less concerned about a black patch here and a change in tarmac colour there. Looking farther up the road also frees up our sense of space giving us more time to react.
The three-step, which involves picking an RP at the exit of the corner, gives the rider the same sense of space. Also, picking an RP close to the exit of the turn allows the rider to get on the throttle sooner. The exit itself tells a story. A vanishing point could mean a crest; a narrowing road could indicate a tightening corner; and if nothing changes, maybe the corner hasn’t ended yet! This additional information that the third step provides helps to set up for the next corner.
My learning?
I was definitely riding quicker with my coach in front. And yes, once he pulled away, I did slow down. But, once he helped me pick my exit RPs, I was instinctively getting on the throttle quicker without even trying.
Wide view

The last of the visual riding skills, and probably the most important, is Wide View. As the name suggests, the more you see and the farther ahead you see, the quicker, safer and smoother is your riding. It’s all about the peripheral vision. According to CSS, wide view is the perfect remedy for target fixation but it requires patience and practice to hone.
Wide view also doesn’t come naturally; one has to work towards it. It has to be a conscious decision to look for kerbs, marshal towers, trees, a slower rider, and even scarred road surfaces in one’s peripheral vision while focusing on the upcoming braking, turning or apex RPs. But get it right, and chances are you will never follow the rider ahead into a bush, onto the road shoulder or into the gravel trap. It also makes overtaking a quicker, less taxing affair.
My learning?
When fixated on the coach riding ahead, I was hitting the turn points and apexes on all turns perfectly. The moment I applied wide view, I was back on my original wayward lines. But, at least I realised I had to work on my RPs and lines.
Pick Up

The pick-up drill is the first specialised machine handling technique, says CSS. It is the introduction to Level 3, which comes with a warning: If it isn’t hurting, it isn’t working. As with most things CSS, pick up drill too is all about getting on the throttle as early as possible. And to do that one must start straightening up the bike as soon as possible.
If steering is what helps in getting the motorcycle leaned over in a turn, it is the steering that helps pick up the bike early too. The plan for the pick up drill is – hit the apex, start rolling on the throttle and when you are sure you are lined up to hit the exit RP, push on the outside handlebar in order to start picking up the bike. The key to an effective pick up drill though is to keep the upper body position as if one is still leaned over in a bend.
As the coaches at CSS like to say, the pick-up technique is yet another tool in your riding skill tool box. But, that doesn’t mean one has to use it all the time. It’s best to use the pick up drill when one is coming on to a long straight, or if the track is wet, or when the rear starts to slide from under you.
My learning?
Picking up the bike early meant I got on the throttle sooner. I also got on it harder than usual. Naturally, it meant higher speed down the main straight. But, I also realised getting on the gas too hard, too early, and while negotiating a chicane, almost put me in the grass on a corner exit.
Next up, it’s Level 3. And some serious body aches…
Photography by Aditya Bedre
Gallery
1/17
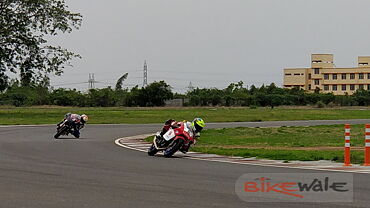
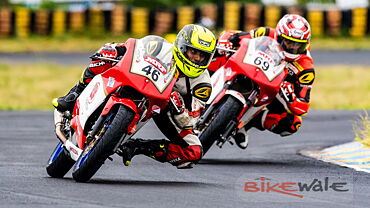
Honda CBR250R Cornering
Double Tap to Zoom






![KTM 390 Adventure X [2025] KTM 390 Adventure X [2025]](https://imgd.aeplcdn.com/272x153/n/cw/ec/190885/390-adventure-x-2025-right-side-view.jpeg?isig=0&q=80)