Introduction

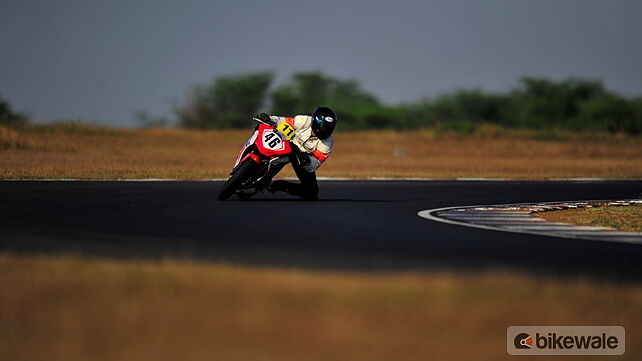
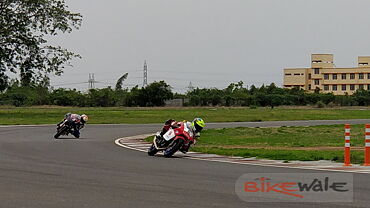
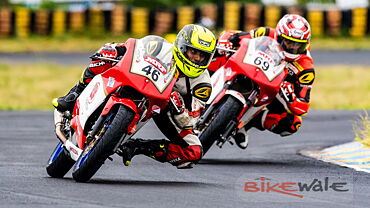
The last thing you want to hear after two days of extensive riding and learning is that the final day will be the toughest yet. The mantra for the day is ‘if it isn’t hurting, it isn’t working. Now, I am no masochist, but I am still looking forward to it. Day 3 or Level 3 of the California Superbike School India after all, touches upon what most motorcyclists consider as the Holy Grail – the right body positioning.
Some might want to get it right to go faster, while others – like me – would like to perfect it to look cool in pictures! The only downside to good body positioning, as I found out yet again, is that kneedown doesn’t come that easy… unless of course you are going properly fast…
Introduction
Hook Turns

First drill of the day, the hook turn, is your last-ditch effort at making things right. Consider a long, fast corner wherein you are done with your steering and are already on the throttle. But, you suddenly find yourself running wide. There are two ways to correct this – first, close the throttle to bring the bike in, and second, add more steering input to lean the bike some more. CSS teaches you to do neither because both can set you up for a crash. Instead, the school teaches you to beat physics.
Back to the corner, and instead of working the throttle or the handlebar to tighten the line, all one has to do is add weight to the front of the motorcycle. Doing so changes the steering geometry of the bike and also shortens its wheelbase. And we know, a bike with a shorter wheelbase steers quicker. This is done by lowering the inside elbow which in turn leans your upper body forward and further into the corner adding weight to the front of the bike.
My learning?
Firstly, it is a lot more physical than I imagined. It’s also not very easy to pick when to use the hook turn. And finally, one can only use the hook once in a corner. Use it too early, and the advantage is lost.
Power Steering

Power steering, also know as pivot steering, is an alternative to quick steering. It does the exact same thing; it helps you turn quicker and later into a turn without adversely affecting the bike’s balance or line through a corner. To do it, the rider must apply pressure to the inside of the handlebar while also pushing the bike in from the outside knee.
The big difference between quick steering and power steering is that the latter is used at higher speeds and for great accuracy. As we go faster, the effort required to turn the bike increases and therefore we need all the muscle we can to do the job quickly and precisely. Power steering, courtesy the involvement of both limbs, makes for a better option for steering at speed.
My learning?
Clearly, I wasn’t going fast enough to deploy power steering and appreciate its benefits. But, I did overhear some guys on superbikes mentioning how it made their steering into fast sweepers a more confident affair.
Power Steering
Knee-to-Knee

Did I mention the mantra for day 3 or Level 3 at CSS was all about being in pain to gain anything at all? Well, it is. And it’s with knee-to-knee that it all goes to hell. Knee-to-knee is used to move around on the motorcycle without making the bike unstable by pulling on the handlebar as we move our weight from side to side.
To better explain this, let’s consider C2 and C3 at the MMRT. It’s an almost 90-degree right (C2) leading onto an equally tight left-hander (C3). To apply knee-to-knee here, one must lock both knees into the tank and then using the thigh muscles pull one’s weight from the right of the bike to the centre while exiting C2 and then move it to the left before applying steering to tip the bike into C3. If it’s a tight chicane, the process remains the same, only the speed at which one must execute it, multiplies.
As does the pain. Within three corners my thighs were burning like someone actually lit them up. Now, if you are light or do any sort of exercise at all, it shouldn’t be this tough for you. But believe me, use it consistently, corner after corner and lap after lap, and even the toughest will struggle to get off the bike and walk the line.
My learning?
It was painful yes, but the positive effect it had while making direction changes was worth it all. The front felt a lot more glued in and there was hardly any shake of the bike every time I moved by body from one side to the other. It works.
Knee-to-Knee
Hip Flick

The hip flick, like the knee-to-knee, demands that knees be locked into the tank and the thigh muscles be used to execute the move. So, yes, this one is painful as well. But, unlike knee-to-knee one doesn’t have to get the whole body to move from side to side for it to work. A hip flick, as the name suggests, only demands the rider to move his / her hips onto the side of the upcoming corner, while the upper body stays either in line with the bike or committed to the ongoing corner.
Yes, the hip flick is to be used before one has hit the exit RP for an ongoing turn in order to help pick up the bike sooner and prepare for a quick direction change onto the other side. It’s great while tackling a fast chicane for instance.
My learning?
The hip flick allowed me to lock onto to the bike better. And given I wasn’t putting in much lean in any case, the hip flick worked better for me on most corners compared to knee-to-knee.
Attack Angles

Having a good line around a racetrack is what makes you fast and smooth. But, one can make that line work better still by having the right angle of attack for every corner. All it takes is a metre here or there while entering the corner, and the outcome can be dramatically different.
Let’s go back to our example used in knee-to-knee; corners C2 and C3 at the MMRT. We have a 90-degree right-hander followed by a small straight into an equally sharp left-hander. Now, if the distance between the corners is large, one can enter the right-hand corner slightly early and run wide at the exit without affecting the line into the left hand turn too much. But, if the straight is short, the previous line would mean too much steering input at the exit of the right-hander to get the bike back in line to the opposite side of the track in order to make the left-hander.
However, if the angle of attack for the right-hander in this situation is made sharper, which is to say the rider enters the turn closer to the kerbs than usual (making a really wide entry), he will hold a tighter line at the exit – maybe around the middle of the track instead of the outer end – and will be better setup for the left-hander.
My learning?
It seemed a little odd at first, running so close to the outside edge of the track and then steering the bike quickly to make the apex. But, it made the entry into the next corner way less dramatic. It also gave me a little more time to set myself up for the upcoming corner since I was covering less ground.
So there you have it, even after having ridden bikes for nearly 20 years, I still learned so much at the California Superbike School India. And, this wasn’t my first time either. I might still not be a faster rider, or one that puts in a lot more lean now. But, I am smoother, more confident, and as I am sure I will find out on the road, a safer rider as well. The California Superbike School India works, no two ways about that.
Our recommendation – make sure you attend it at least once!
Gallery
1/20
Honda CBR250R Cornering
Double Tap to Zoom


