How to change your headlamp bulb

The road to achieving zen with the art of motorcycle maintenance is long and scattered with many frustrated DIY attempts and unused spare parts. And then there's the humiliation of finally giving up, swallowing your pride and handing over your bike to a mechanic. Sometimes, the thing that is standing between you and maintenance nirvana is something as minor as a headlight bulb. It should ideally have been a simple task of pulling out the old bulb and plugging in the new one. Instead, the task seems to come with a separate manual.
Yet, changing a headlight bulb doesn't really require complex skill sets. In fact, once you get the hang of it, it’s easy-peasy from then on. And if you are somebody who loves to do road trips on a bike, it's a pretty useful skill to pick up. On a poorly lit road, it makes all the difference in life and death. So if your bulb starts to give out while riding on a dimly lit state highway, you want to be able to quickly pull over, fish out the spare bulb and replace it.
One does not need any heavy duty tools - just a simple screw-driver or spanner corresponding to the sizes of the screws and bolts used on your motorcycle. To change the head light bulb, make sure your motorcycle is turned off and the battery is disconnected and then follow these three steps:

1.Locate the screw which holds the assembly of the headlight case and the reflector together. The location of the screw differs with each motorcycle model, even amongstfully-faired and naked versions of the same model. Once the assembly is unscrewed, the headlight case willdetach from the motorcycle. Pull it out carefully to ensure that you don’t chip off any wire.

2.Once the assembly is detached, locate the plug and carefullyremove it from the socket.This stage of the task should be performed with dry hands in a relatively dry environment to prevent any moisture from coming into contact with the plug.

3.Pull out the bulb slowly and carefully. The bulb might breakif handled roughly. Once the old bulb is plugged out, clean the plug with an appropriate cleanser or a blower before you plug in the new bulb. Once the new bulb is plugged in, follow the same steps in reverse and screw the dismantled assembly back into place.
Photography by Kapil Angane
Gallery
1/4
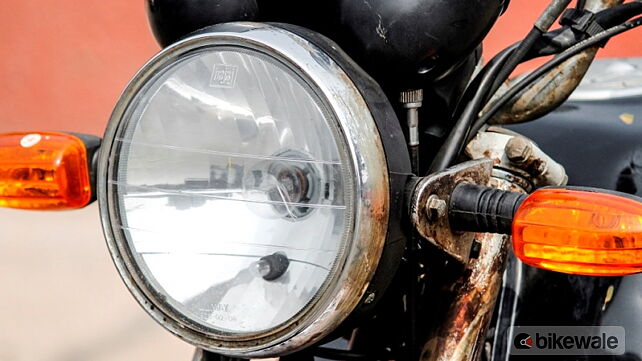
Bajaj Pulsar 150 Headlamp
Double Tap to Zoom












![KTM 390 Adventure X [2025] KTM 390 Adventure X [2025]](https://imgd.aeplcdn.com/272x153/n/cw/ec/190885/390-adventure-x-2025-right-side-view.jpeg?isig=0&q=80)